Art Working example of Trapping for screen printing positive/stencil

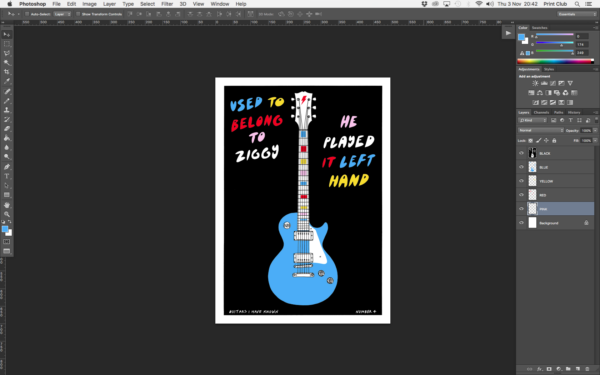
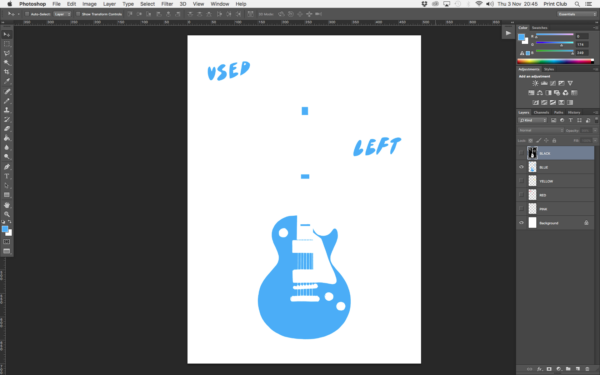
STEP 1 – Start with your artwork on Photoshop. Here is Rose Stallard’s artwork divided into 5 layers, one for each of the colours of the print.
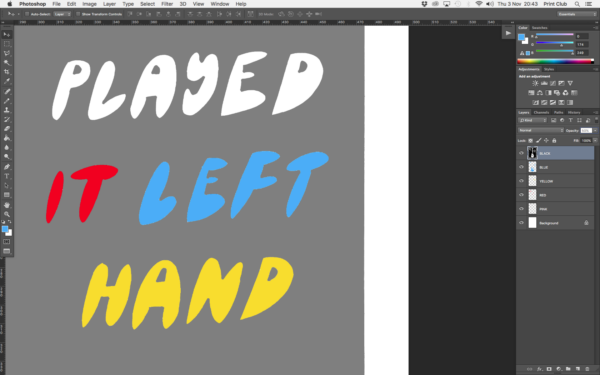
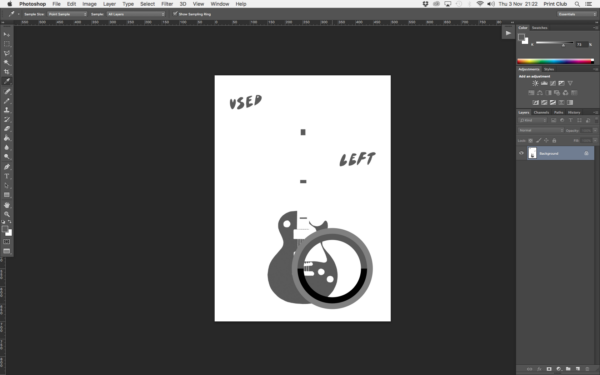
STEP 2 – By lowering the opacity of the top black layer we can see that there is no overlapping of colour. This will make printing very tricky as even the slightest mis-registration will result in the white of the paper appearing where there should be colour. So we need to add some trapping to the colours below to make it easier to print!
STEP 3 – Using the blue word ‘Left’ as an example start by using the wand to select a letter. This is where having all of your print layers on separate photoshop layers comes in handy. Use the selection wand and click on a letter. Using the selection tool will enable us to create an even layer of trapping around any shape.

STEP 4 – I’m going to highlight all of the blue letters at once here. To add another selection simply hold down SHIFT whilst using the wand.
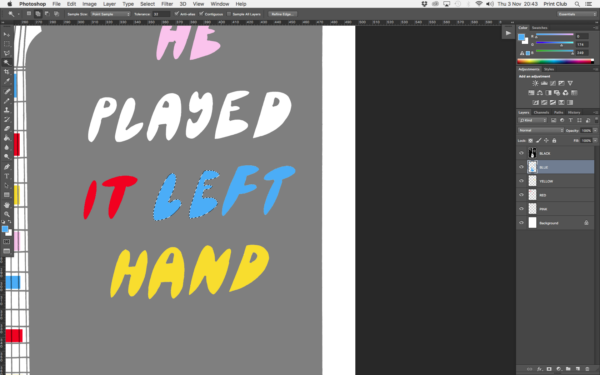
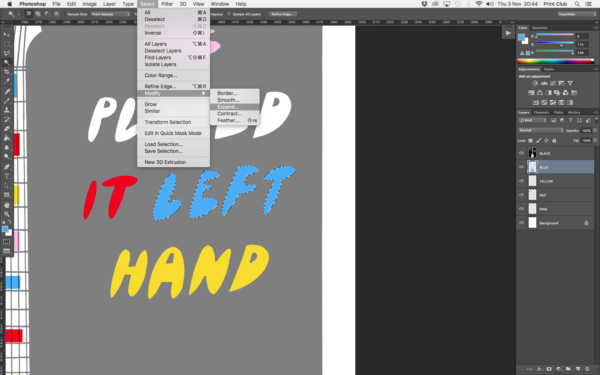
STEP 5 – I’ve clicked on all of the blue letters whilst holding the SHIFT key down and now I have the whole word selected. Once you’ve highlighted everything you need click on SELECT > MODIFY > EXPAND
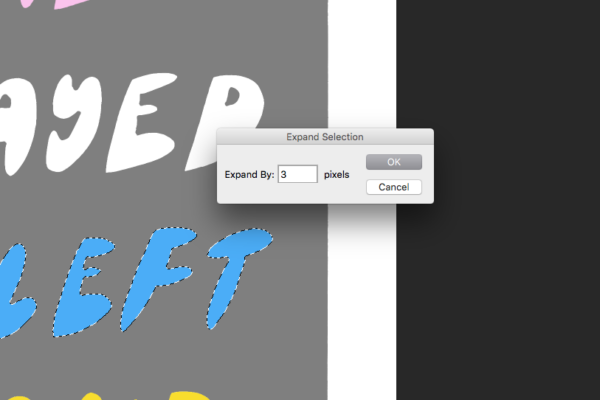
STEP 6 – The EXPAND option is going to grow your selection by a chosen amount of pixels. Depending on the size of your artwork / trapping requirements you will have to experiment with how much trapping is needed. Here I’m going to use 3 pixels.
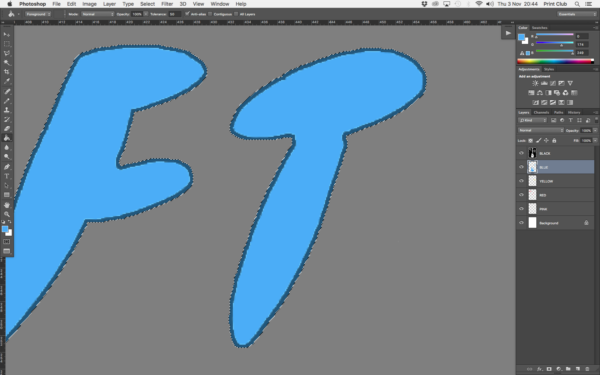
STEP 7 – Once the selection has expanded you will then need to fill in the gap created using either the Bucket or brush tool.
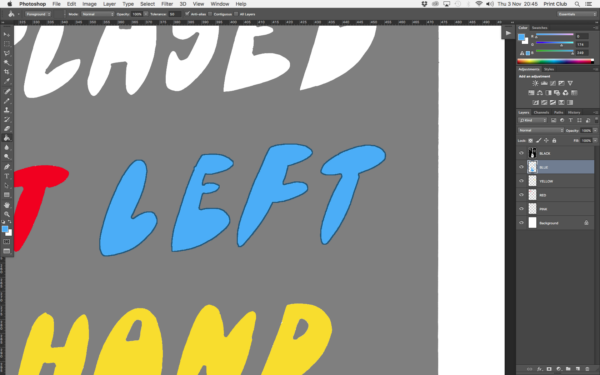
STEP 8 – Once filled in its clear now that with the transparent black layer on top the blue is bigger than it needs to be, and therefor has sufficient trapping to print.
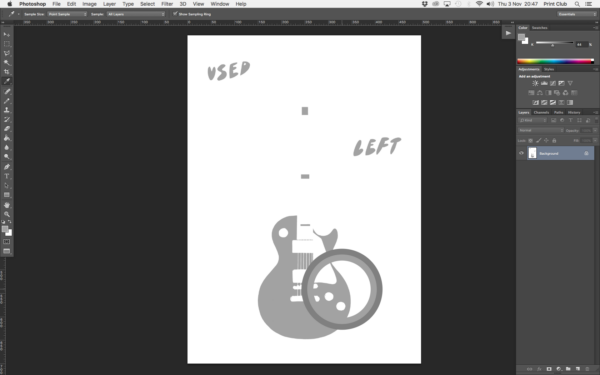
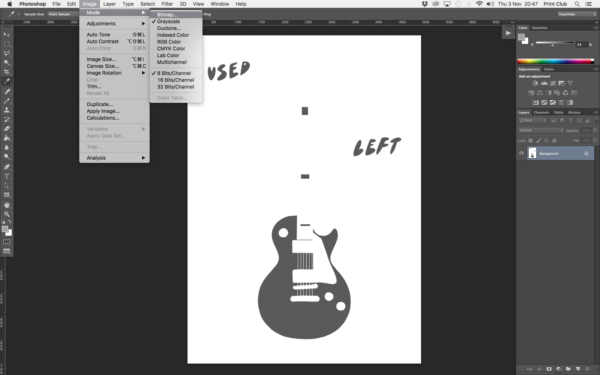
STEP 9 – Once trapping has been applied to all necessary places we need to get the layers ready to go to print. This means making everything on the layers pure black. Using a process BITMAPPING Photoshop can turn everything in your image into either pure black or white, but there are a few steps needed to do before doing this. The reason everything needs to be black is so that when exposing using our positives we can guarantee all of the detail will come out properly, any grey pixels might not block out the UV light of an exposure unit, but black ones will. Firstly have the layer that is print ready the only visible one. This process will need to be repeated for all of your layers. I’m going to use the blue layer here.
STEP 10 – Firstly to BITMAP an image you must first be in grayscale mode. So click on IMAGE > MODE > GREYSCALE. It will ask if you want to flatten all the layers at this point and that’s fine, remember you are going to have to repeat this process for all layers.

STEP 11 – To BITMAP our image the tone of grey needs to be over 50% (I will explain why shortly!) and by using the EYEDROPPER tool we can see that this is 44% grey. 0% is white and 100% is pure black, once BITMAPPED everything on screen will be one of those values.
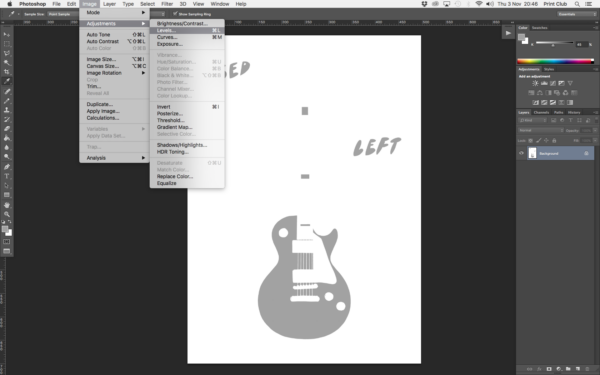
STEP 12 – To make the image darker (and over 50% in terms of our scale of black to white) click on IMAGE > ADJUSTMENTS > LEVELS.
STEP 13 – Levels will help us lighten or darken an image using a white, grey and black slider. This is how the image looks without changing anything.
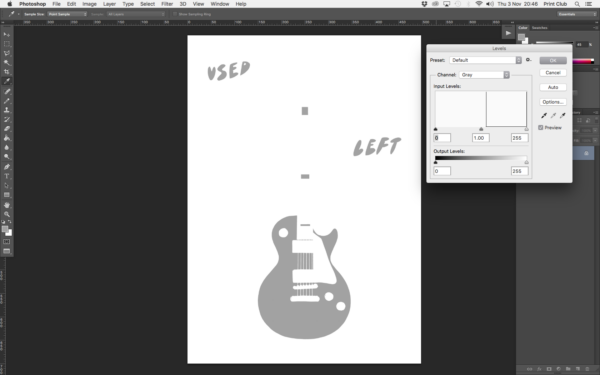
STEP 14 – You can see that by adjusting the black slider the image is much darker.

STEP 15 – By using the EYEDROPPER tool again we can see the tone is 77% grey. Now we can BITMAP!
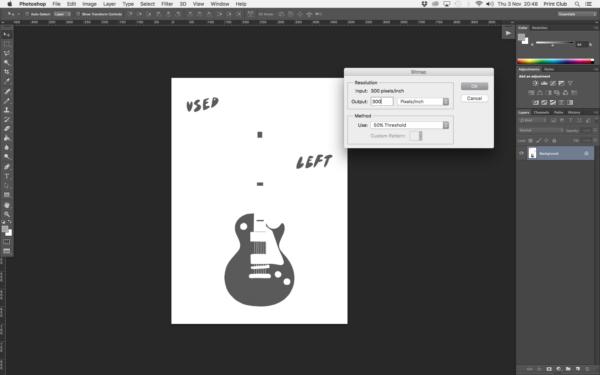
STEP 16 – Start by clicking on IMAGE > MODE > BITMAP
STEP 17 – This dialogue will appear! Firstly we can choose the resolution that our image will be bitmapped into. Normally you should be making artwork at 300 dpi, and bitmapping into the same resolution that your artwork is. So here Rose’s is 300 and it will be being turned into a 300 dpi image. Under method 50% threshold should be selected. This is going to take everything on our screens that is 50% black and above and make it pure black and make everything else white. This is why you need to make sure everything is above 50% black before BITMAPPING, otherwise once you click okay you’d be left with a white canvas!
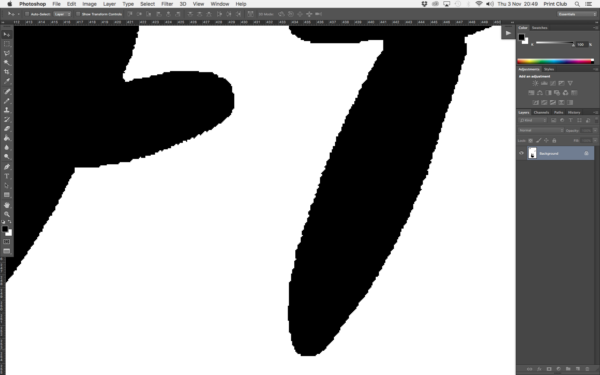
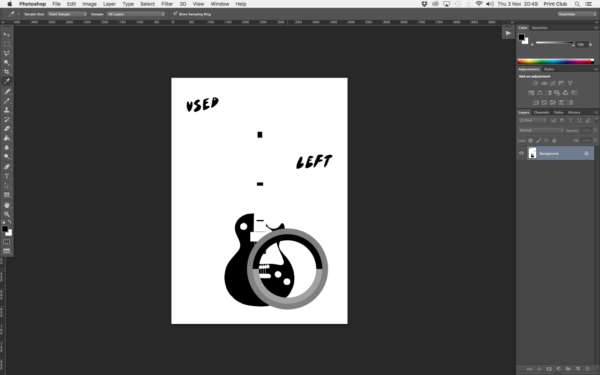
STEP 18 – Hit okay and you should see the parts of your image turn black. Using the EYEDROPPER we can see that’s everything is 100% black!
STEP 19 – If you zoom in on the image you can see there are no grey pixels, just black and white. This will ensure that when printed out onto tracing paper or acetate that all UV should be blocked out when exposing, yielding a clean edge stencil to print with!